
MQTT Wi-Fi Module Installation Guide
Wi-Fi Module lets you integrate your air conditioner to Home Assistant platform locally via MQTT integration. It supports bi-directional control for both remote operation via Home Assistant and physical control via IR remote. Status of the A/C unit is always synchronized, thanks to the direct connection to the A/C controller.
The module supports a wide range of air conditioner models and communicates with the A/C unit via 5V UART TTL, using a built-in logic level converter. It can be powered by either a 5V supply or a DC input ranging from 7 to 28V.
At its core is the ESP32-S3, a popular microcontroller widely used in smart home systems.
I. Setup Button and LED
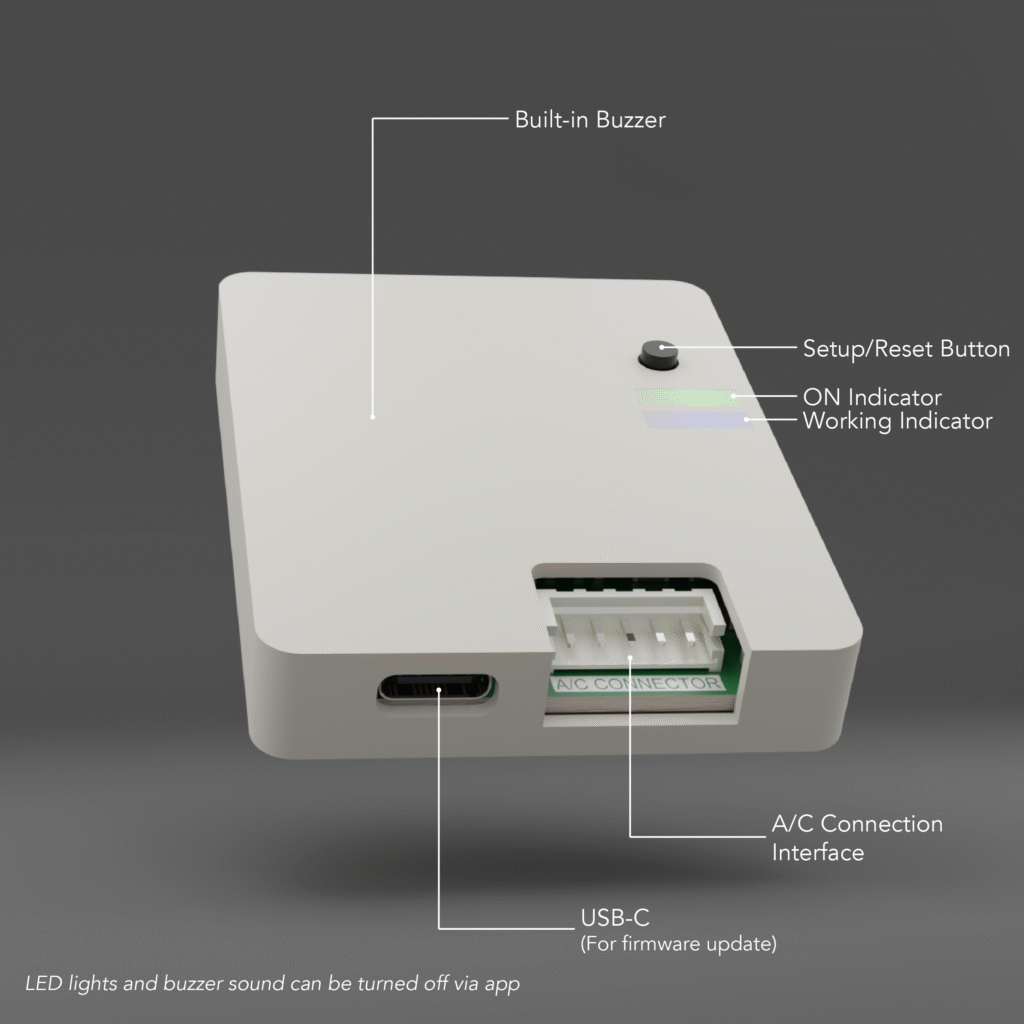
Setup / Reset Button
Single Press
Toggle A/C power (ON/OFF)
Hold 5-15 seconds
Reboot Module
Hold >15 seconds
Factory Reset
LED Indicators
Green
Static:
Normal Operation
Blinking:
Communication problem between module and A/C
Blue
Off:
Normal Operation: Wi-Fi and MQTT are connected
Blinking:
Wi-Fi or MQTT is not connected
Momentarily:
Module is currently processing
II. Hardware Installation

WARNING
Important Installation Notice
Installing the Wi-Fi module requires access to the air conditioner’s main control board. Before beginning installation, ensure that the circuit breaker is turned off.
This procedure involves potential risks, including electric shock or injury from working at height. It is intended for individuals with experience in handling electrical equipment and air conditioner components. The manufacturer/seller assumes no responsibility for any damage, injury, or other consequences resulting from improper installation.
If you are not confident in performing the installation safely, it is strongly recommended to engage a qualified professional technician.
Daikin Air Conditioners
List of compatible air conditioners can be found here.
- Turn off the circuit breaker
- Remove the front cover of the air conditioner
- For models requiring a PC Board, install the PC Board onto the main board first (follow the manual in the box)
- Plug the connector into the port S21 or X50A + X35A ports
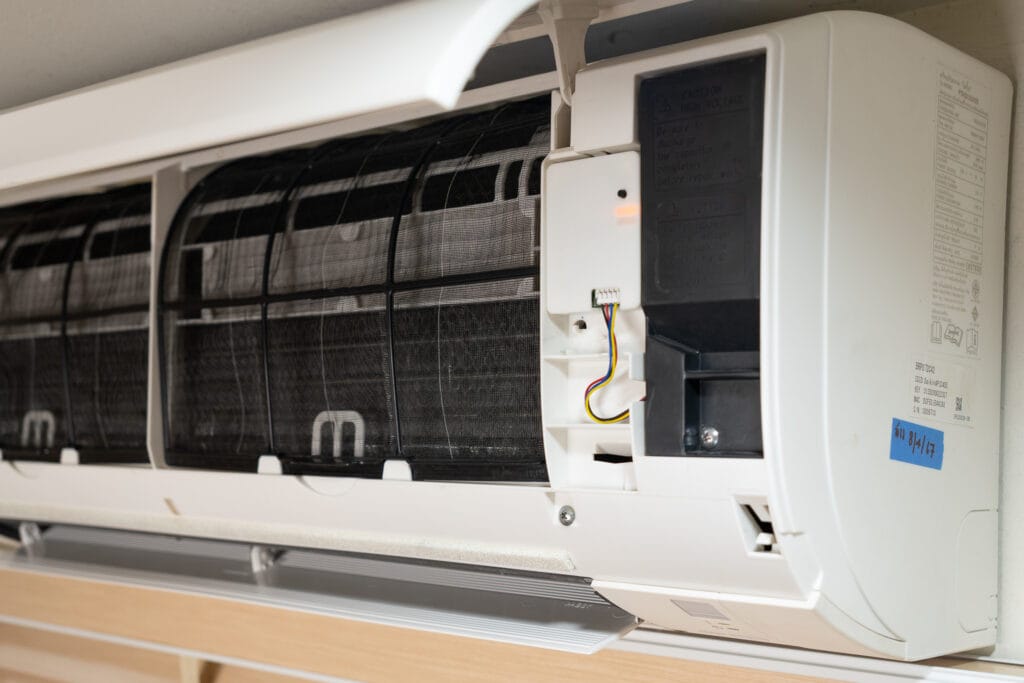
- You can place the module in the designated space insde the AC for the Wi-Fi Module or outside the AC for the best Wi-Fi signal
- Turn on the circuit breaker and check the module status light
- Connect to the app
A. Wall-Mounted Installation without an additional PC Board
For example FTKZ
Connect directly to S21
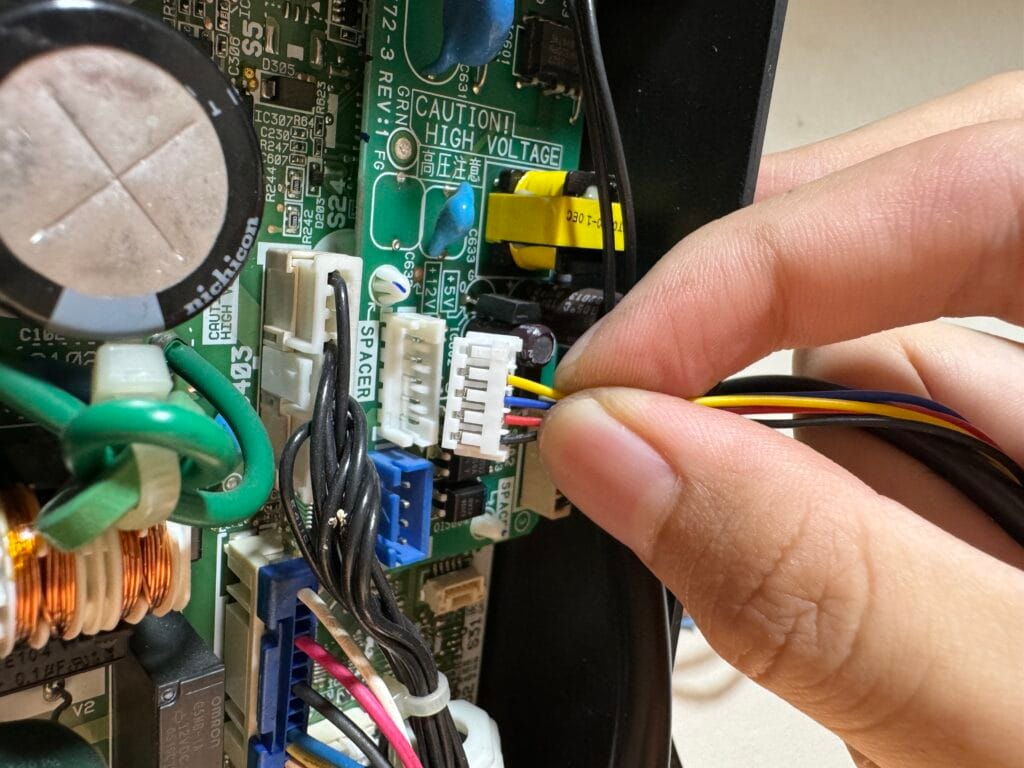
B. Wall-Mounted Installation with an additional PC Board
For example FTKQ
Connect PC Board to S403. Then conect Wi-Fi Module to S21 on PC Board
A. Wall-Mounted Installation without an additional PC Board
For example FTKZ
Connect directly to S21
B. Wall-Mounted Installation with an additional PC Board
For example FTKQ
Connect PC Board to S403. Then conect Wi-Fi Module to S21 on PC Board
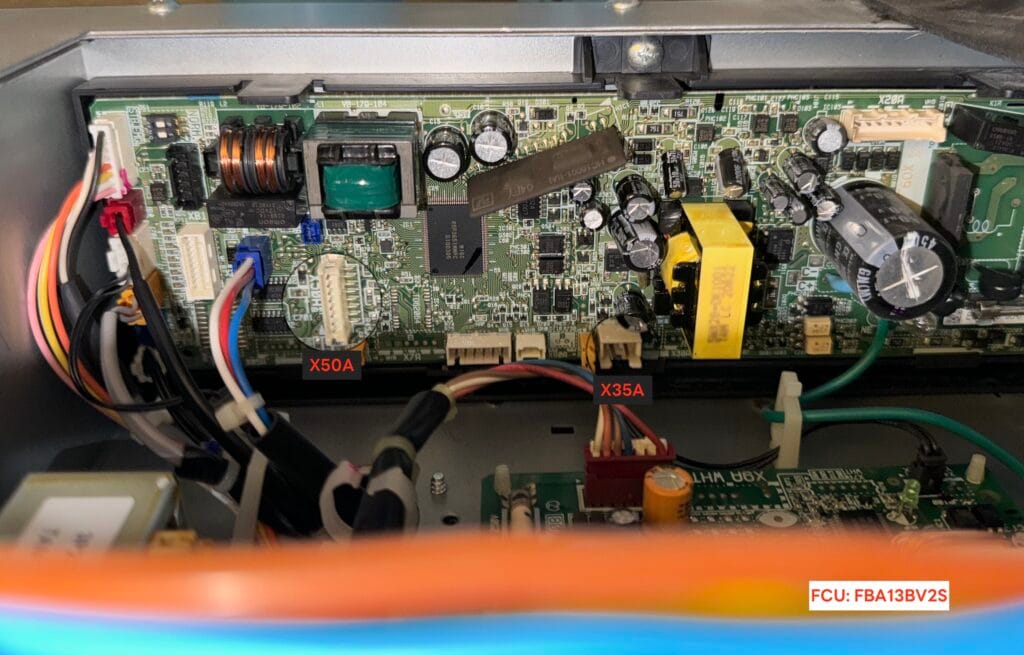
C. Cassette Installation
For example FBA
Connect directly to X50A and X35A
Mitsubishi Electric Air Conditioners
List of compatible air conditioners can be found here.
- Turn off the circuit breaker
- Remove the front cover of the air conditioner
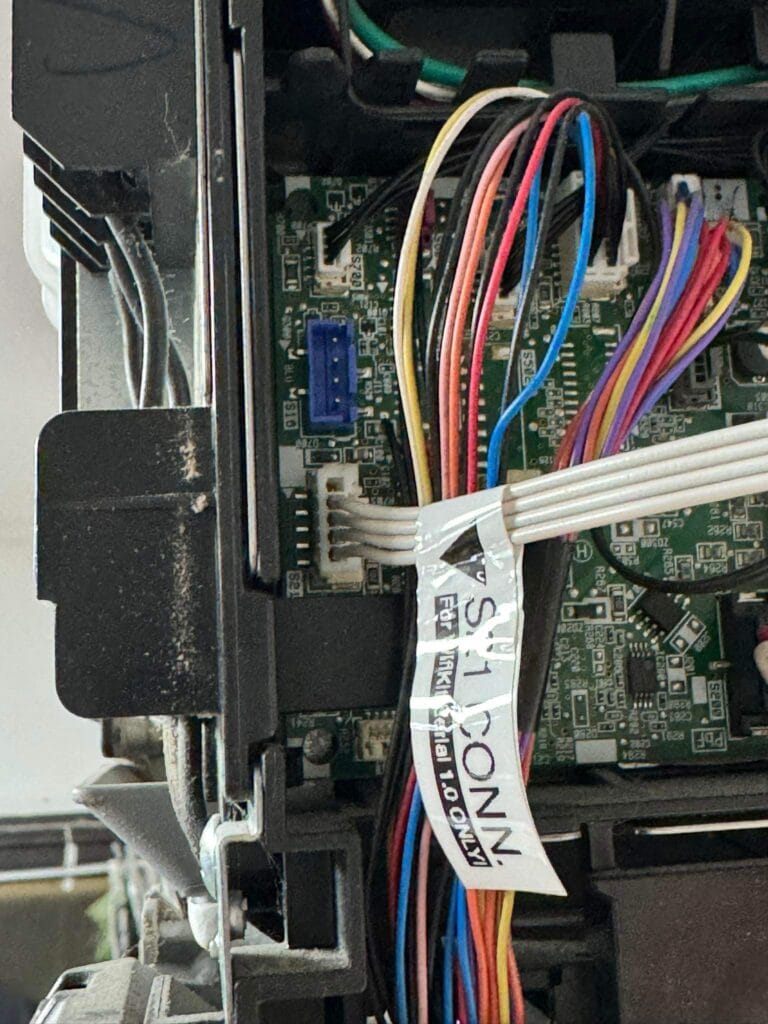
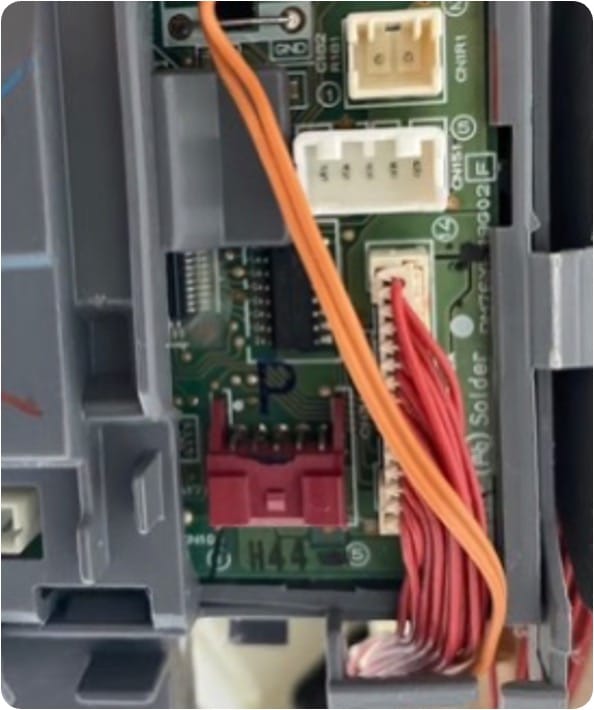
- Find the CN105 port (red slot) as shown in the picture. The position of CN105 may be in the control box (metal box) or on a small board at the front (depending on the model)
- Plug the connector into the port
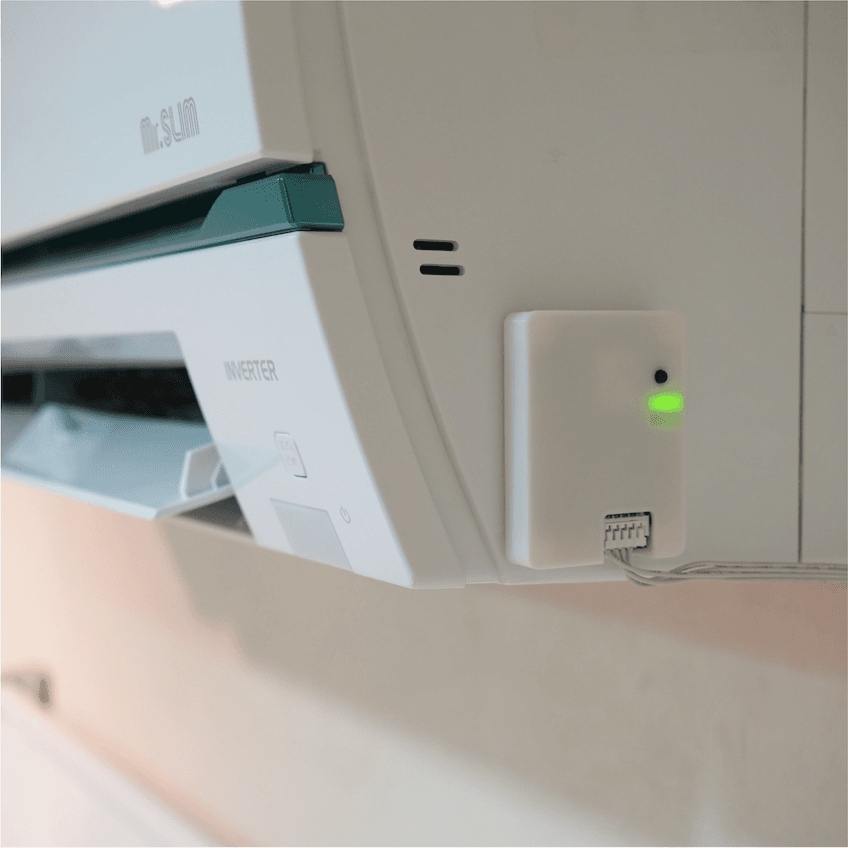
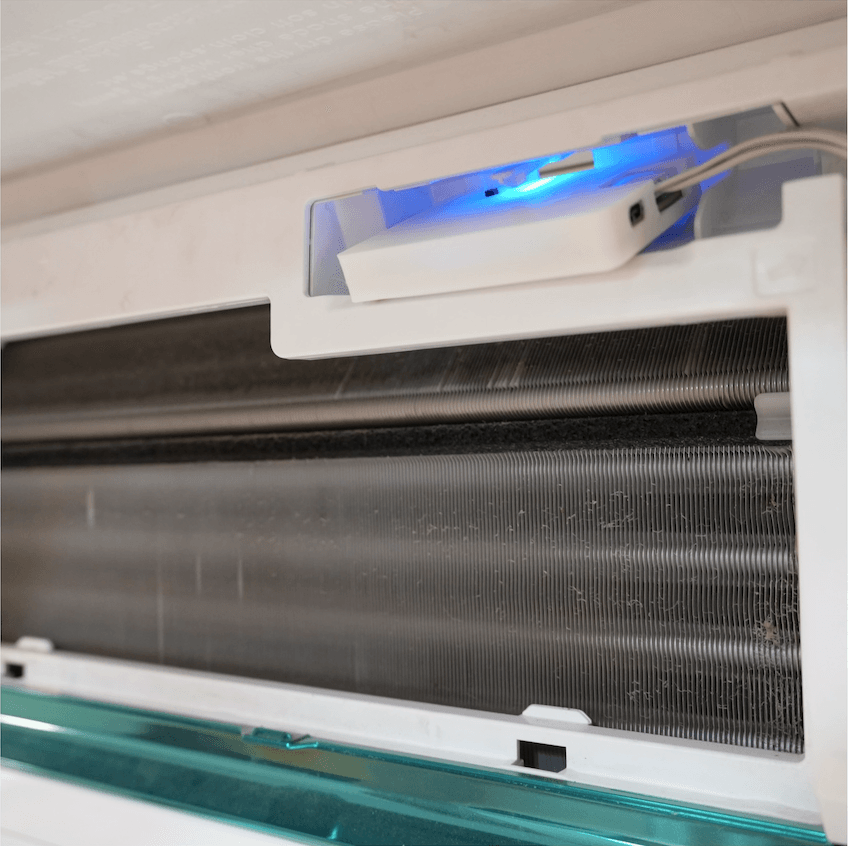
- You can place the module anywhere, but it is recommended not to put it inside the control box as it may reduce Wi-Fi signal strength. Installing it outside will give the best signal.
- Turn on the circuit breaker and check the module status light
- Connect to the app
Location of CN105 Connector
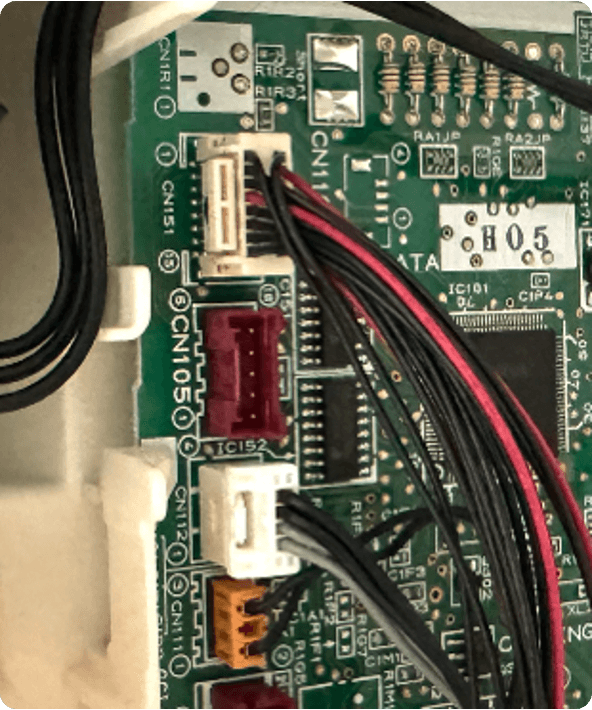
Main PCB (Side)
Remote Receiver PCB (Front)
Recommended Placements
Installation Video
III. Adding to Home Assistant
The Wi-Fi module communicates with Home Assistant via the MQTT protocol. Therefore, you need to set up an MQTT Broker and MQTT Integration first. If you have already done this, you can skip ahead to connecting to Home Assistant
1. Install MOSQUITTO MQTT Broker
- Go to Settings -> Add-ons -> Add-on Store -> Mosquitto Broker.
- Click INSTALL and wait for the installation to complete.
- Click START.
- Go back to Settings -> Integration, you should see MQTT appear under Discovered.
- Click Configure and follow the steps.
By default, the MQTT Username and Password are the same as your Home Assistant credentials.
If you want to set them differently, go to the Configuration tab and set the MQTT username and password in the logins section as shown below:
- username: user
  password: passwd
2. Connect the Wi-Fi module to Home Assistant
- Use your phone to search for a Wi-Fi network named HVAC-XXXXXX for Mitsubishi or DAIKIN_XXXXXX for Daikin airconditioners, and connect to it.
- The configuration page should open automatically. If not, go to the URL
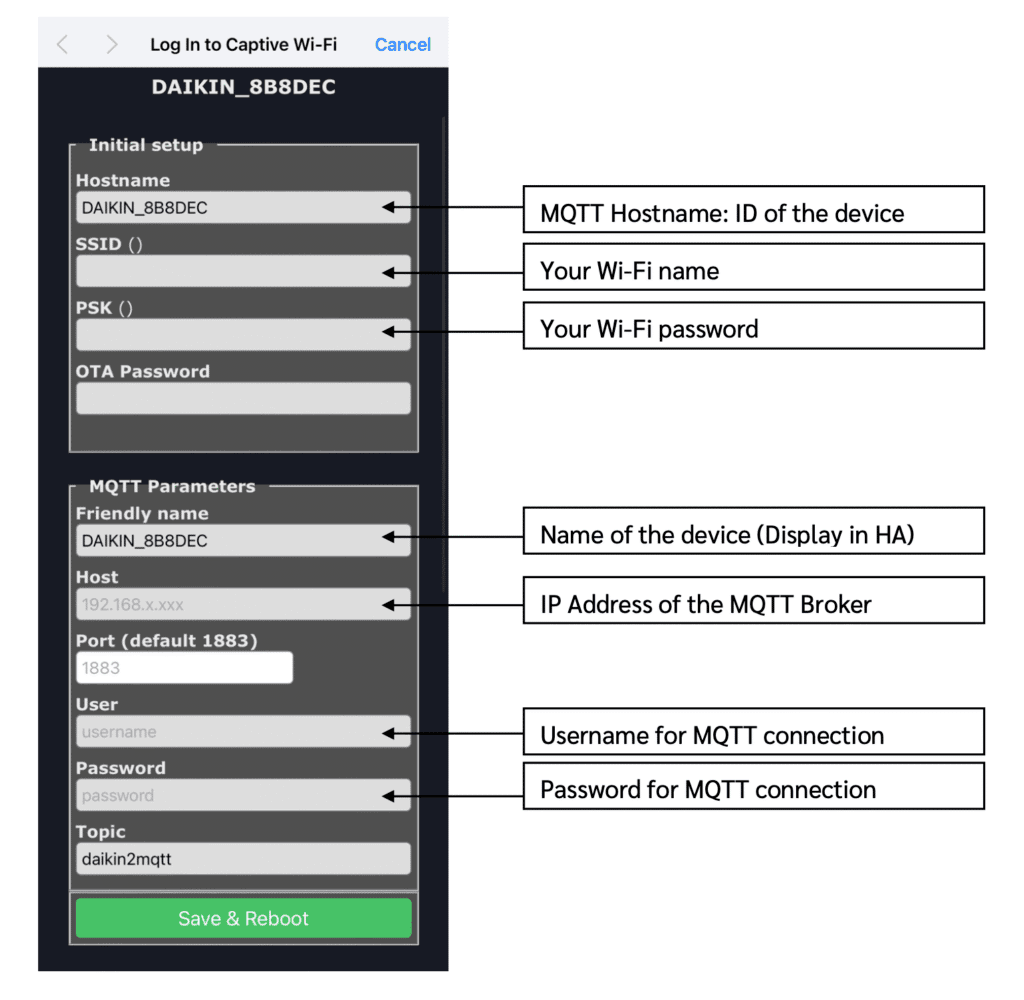
8.8.8.8. - Enter your Wi-Fi and MQTT details for connection:
- Hostname: Device name in the system
MQTT Hostname should contain only alphanumeric (aA-zZ, 0-9), dash (-), or underscore (_). No special character or space is allowed. - SSID: Name of the Wi-Fi network you want to connect to. SSID should not contain spaces or emojis.
- PSK: Password for the Wi-Fi network.
- Friendly Name: Name displayed in Home Assistant.
- Host: IP address of the MQTT Broker.
- User: MQTT username you set up.
- Password: MQTT password you set up.
- Click Save & Reboot to save the settings and connect.
- The air conditioner will automatically appear in the MQTT Integration.
If the module does not connect or continues to broadcast the Wi-Fi AP, it means it could not connect to the Wi-Fi network.